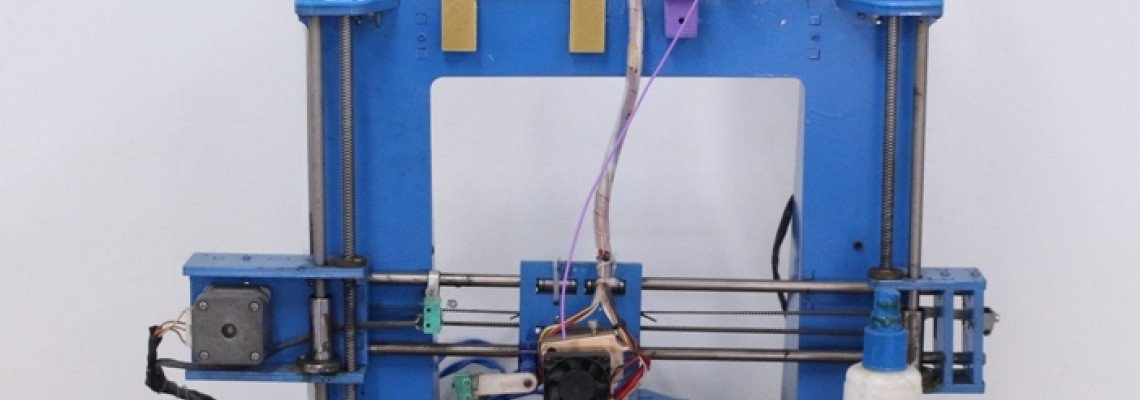
qu'est-ce que une imprimante 3D:
Une imprimante 3D est un appareil qui crée des objets tridimensionnels en déposant des matériaux couche par couche selon un modèle numérique ou un plan. Elle fonctionne en ajoutant du matériau plutôt qu'en le soustrayant (comme les méthodes d'usinage traditionnelles) et peut produire une large gamme d'objets avec différentes formes, tailles et complexités.
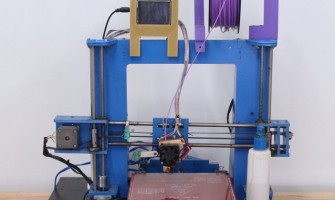
Dans ce tutoriel, nous verrons comment fabriquer une imprimante 3D avec un dispositif Arduino.
Pourquoi Arduino ?:
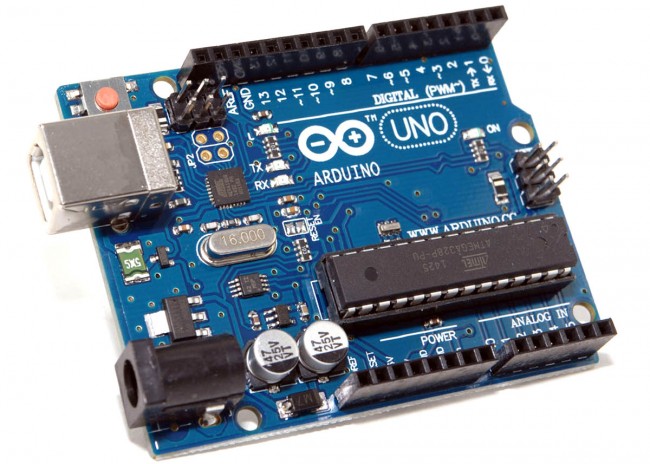
Arduino est un choix populaire pour les projets de bricolage, y compris la construction d'imprimantes 3D, pour plusieurs raisons :
Abordabilité : Les cartes Arduino sont relativement peu coûteuses par rapport à d'autres plateformes de microcontrôleurs, ce qui les rend accessibles aux amateurs et aux passionnés.
Open-source : Le matériel et le logiciel Arduino sont open-source, ce qui signifie que les fichiers de conception et le code sont librement disponibles pour la modification et la distribution. Cela favorise une grande communauté de développeurs qui contribuent à la plateforme et partagent leurs projets et leurs connaissances.
Facilité d'utilisation : Les cartes Arduino sont conçues dans un souci de simplicité, ce qui les rend adaptées aux débutants ayant peu d'expérience en programmation ou en électronique. L'IDE Arduino (Environnement de Développement Intégré) offre une interface conviviale pour écrire et téléverser du code sur la carte.
Polyvalence : Les cartes Arduino peuvent être facilement intégrées à une large gamme de capteurs, actionneurs et autres composants électroniques, ce qui permet une flexibilité dans la conception et la fonctionnalité du projet.
Support de la communauté : Arduino dispose d'une communauté d'utilisateurs et de développeurs grande et active qui fournissent un support, des tutoriels et des ressources en ligne. Cet aspect communautaire peut être précieux pour résoudre les problèmes et trouver de l'inspiration pour les projets.
Dans l'ensemble, Arduino offre une plateforme pratique pour le prototypage et la construction de projets de bricolage comme les imprimantes 3D en raison de son abordabilité, de son accessibilité, de sa facilité d'utilisation, de sa polyvalence et du solide soutien de la communauté.
Composants nécessaires:
Pour commencer, vous devez commencer à rassembler les composants et les fournitures pour démarrer. Voici les éléments que vous devez cocher.
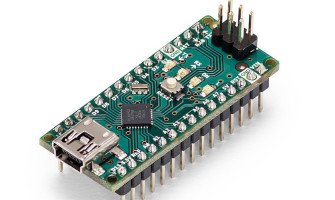
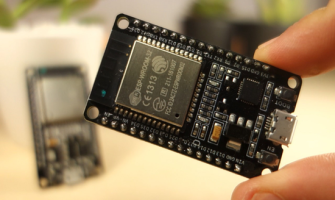
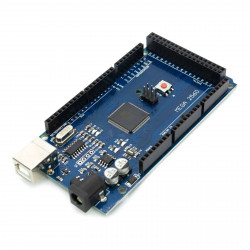
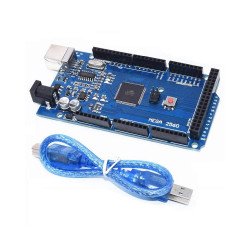
- Une carte Arduino : Le cerveau de l'imprimante, responsable du traitement des commandes et du contrôle du mouvement des moteurs et autres périphériques. Les choix courants incluent l'Arduino Mega ou l'Arduino Uno.
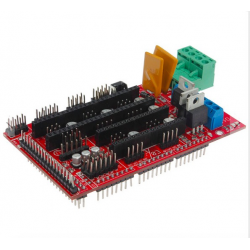
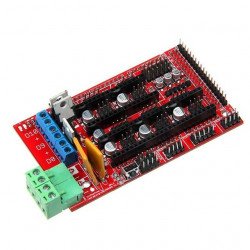
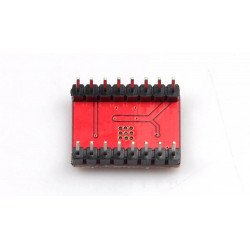
- Une carte contrôleur ramps 1.4 : Elle est utilisée à des fins d'interface comme la connexion du commutateur de fin de course, du lit chauffant, du pilote de moteur pas à pas, du hotend et d'une multitude d'autres composants avec l'Arduino.
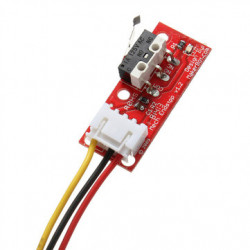
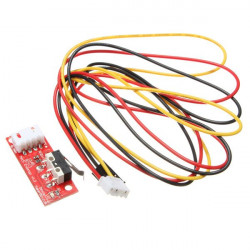
- Commutateur de fin de course optique : Il s'agit d'un commutateur de capteur qui vient avec deux marquages. NO ou NC (Normalement Ouvert/Normalement Fermé). Ils fonctionnent comme des déclencheurs lorsque l'axe XYZ d'une imprimante atteint son point final. Ils peuvent être utilisés à tout moment pour arrêter et démarrer les mouvements.
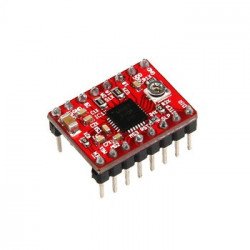
- Moteur pas à pas NEMA 17 : Il s'agit d'un moteur qui permet à l'utilisateur de régler la vitesse de rotation des pièces mobiles de l'imprimante. Le moteur moyen comporte environ 200 pas, mais vous pouvez en obtenir un plus grand. Lit chauffant PCB : Cela garde les pièces en plastique extrudé chaudes en tout temps pour les empêcher de se déformer.
- Alimentation électrique : Une alimentation électrique 12V/20A est nécessaire pour faire fonctionner un kit simple. Ces métriques d'alimentation sont le minimum auquel vous devriez viser pour réussir.
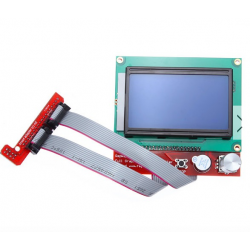
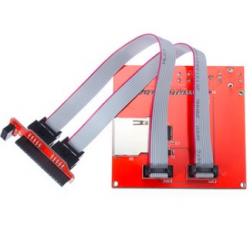
- Affichage pour imprimante 3D: désigne un composant d'interface visuelle intégré à une imprimante 3D, se composant généralement d'un écran LCD (écran à cristaux liquides). Cet affichage est utilisé pour fournir des informations en temps réel et des options de contrôle à l'utilisateur pendant le processus d'impression. Il peut afficher des détails tels que la progression de l'impression, les lectures de température, les options de menu et les messages d'état, permettant aux utilisateurs de surveiller et d'interagir avec l'imprimante sans avoir besoin de compter uniquement sur une interface informatique.
Le Processus:
Étape 1 : Construire le Cadre
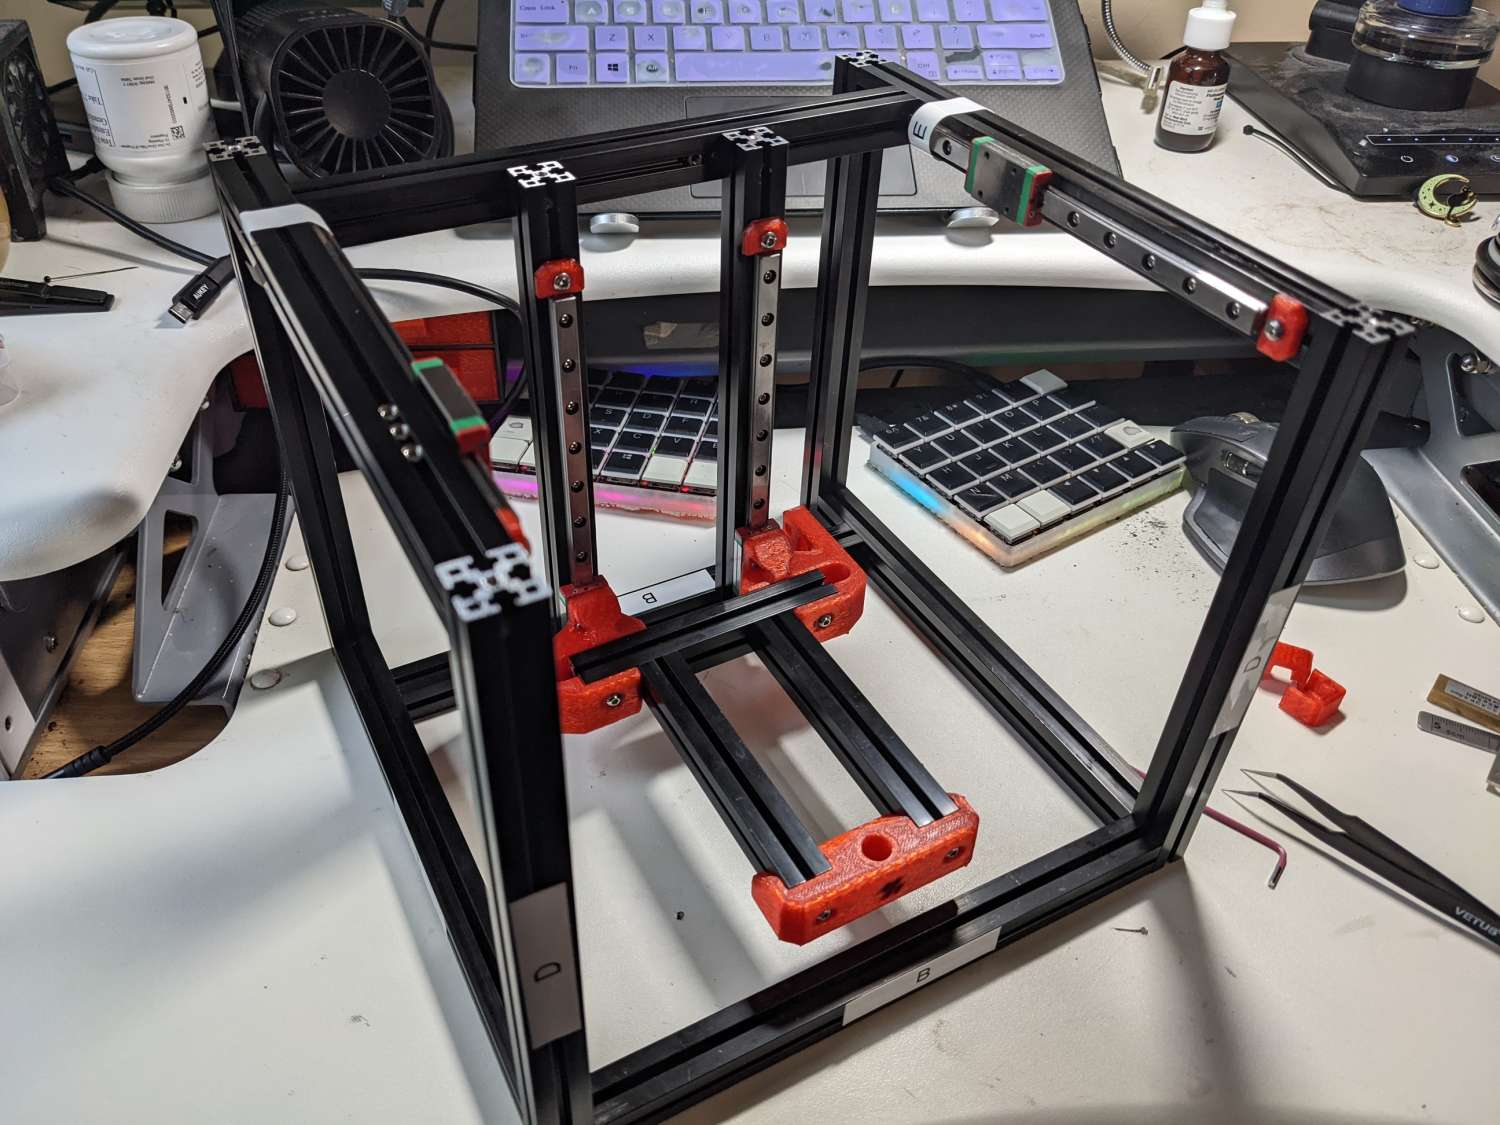
Rassembler les Matériaux : Collectez tous les matériaux nécessaires pour construire le cadre. Cela inclut généralement des extrusions en aluminium, des équerres, des connecteurs d'angle, des vis et des écrous. Assurez-vous d'avoir les bonnes tailles et quantités selon la conception de votre imprimante.
Couper les Extrusions : Si vos extrusions en aluminium sont plus longues que nécessaire, mesurez et coupez-les aux longueurs appropriées à l'aide d'une scie ou d'un outil de coupe d'aluminium spécialisé. Utilisez un équerre ou une boîte à onglets pour garantir des coupes précises à angle droit.
Assembler le Cadre de Base : Commencez par assembler le cadre de base de l'imprimante. Disposez les extrusions sur une surface plane selon les spécifications de votre conception. Utilisez des équerres d'angle et des vis pour joindre fermement les extrusions aux coins, formant ainsi une base solide.
Ajouter les Supports Verticaux : Fixez les extrusions verticales aux coins du cadre de base pour créer les montants de l'imprimante. Utilisez des équerres d'angle et des vis pour fixer les extrusions verticales au cadre de base de manière sécurisée.
Installer les Poutres Transversales : Installez des poutres transversales ou des extrusions supplémentaires entre les montants verticaux pour fournir stabilité et soutien au cadre. Ces poutres transversales serviront également de points de montage pour divers composants de l'imprimante.
Assurer les Connexions : Vérifiez toutes les connexions et assurez-vous qu'elles sont serrées et sécurisées. Utilisez des écrous et des boulons supplémentaires si nécessaire pour renforcer les joints critiques et éviter les oscillations ou les désalignements.
Vérifier l'Alignement : Utilisez un niveau ou une équerre pour vérifier l'alignement et l'équerrage du cadre. Ajustez si nécessaire pour vous assurer que tous les côtés sont droits et perpendiculaires les uns aux autres.
Tester la Stabilité : Une fois le cadre assemblé, testez sa stabilité en le secouant ou en le tapotant légèrement. Le cadre doit rester rigide et stable sans mouvement excessif ou flexion.
Monter les Composants : Une fois le cadre construit et stable, vous pouvez procéder au montage d'autres composants de l'imprimante, tels que les moteurs, l'électronique, le plateau d'impression et l'extrudeuse, selon la conception de votre imprimante.
Finaliser l'Assemblage : Terminez l'assemblage de l'imprimante en fixant tous les composants nécessaires et en les câblant ensemble. Suivez les instructions d'assemblage fournies avec votre kit d'imprimante ou votre conception.
En suivant ces étapes, vous pouvez construire avec succès le cadre de votre imprimante 3D, offrant une base solide pour le reste du processus d'assemblage.
Etape 2: L'Affichage
.png)
Le rôle de l'écran dans une imprimante 3D est essentiel à plusieurs égards dans le processus :
Interface Utilisateur : L'écran fournit une interface conviviale pour interagir avec l'imprimante. Les utilisateurs peuvent naviguer dans les menus, sélectionner les fichiers à imprimer, surveiller la progression de l'impression et ajuster les paramètres directement depuis l'écran sans avoir besoin d'une interface informatique séparée.
Surveillance en Temps Réel : L'écran permet aux utilisateurs de surveiller en temps réel des paramètres importants tels que la température d'impression, la température du lit d'impression, la vitesse d'impression et le temps écoulé. Cela aide les utilisateurs à s'assurer que l'imprimante fonctionne dans des conditions optimales et permet d'apporter des ajustements en temps voulu si nécessaire.
Indication de l'État : L'écran fournit des retours visuels sur l'état du processus d'impression, indiquant si l'imprimante est en chauffe, en impression, en refroidissement ou rencontre des erreurs ou des problèmes. Cela permet aux utilisateurs d'identifier rapidement et de résoudre les problèmes éventuels pendant l'impression.
Messages d'Erreur : En cas d'erreurs ou de problèmes pendant l'impression, l'écran peut fournir des messages d'erreur informatifs ou des instructions pour guider les utilisateurs sur la façon de diagnostiquer et de résoudre le problème. Cela aide les utilisateurs à identifier et à résoudre les problèmes de manière efficace, réduisant ainsi les temps d'arrêt et améliorant la qualité globale de l'impression.
Etape 3: Préparation de l'axe Y et de l'axe Z
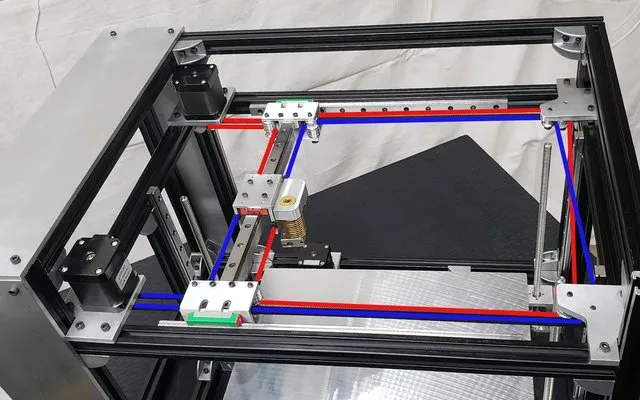
La préparation de l'axe Y et de l'axe Z pour une imprimante 3D implique plusieurs étapes pour assurer un alignement correct, un mouvement fluide et une fonctionnalité fiable de ces composants cruciaux.
Préparation de l'axe Y :
- Installation des Guides Linéaires de l'axe Y : Montez des guides linéaires ou des rails le long du cadre de l'axe Y pour fournir un mouvement fluide et précis au plateau d'impression.
- Fixation du Moteur de l'axe Y : Installez le moteur pas à pas de l'axe Y à une extrémité du cadre, qui entraîne le mouvement du plateau d'impression le long de l'axe Y.
- Connexion de la Courroie ou de la Vis de l'axe Y : Attachez fermement la courroie ou la vis de l'axe Y au moteur pas à pas et à l'extrémité opposée du plateau d'impression. Ce mécanisme traduit le mouvement rotatif du moteur en mouvement linéaire, déplaçant le plateau d'impression d'avant en arrière le long de l'axe Y.
- Assurer l'Alignement : Vérifiez et ajustez l'alignement des composants de l'axe Y pour vous assurer qu'ils sont parallèles et perpendiculaires au cadre de l'imprimante. Un bon alignement est essentiel pour un mouvement fluide et précis.
Préparation de l'axe Z :
- Montage des Guides Linéaires de l'axe Z : Installez des guides linéaires ou des tiges verticalement le long du cadre de l'imprimante pour guider le mouvement de l'ensemble de la tête d'impression ou du hotend.
- Installation du Moteur Pas à Pas de l'axe Z : Fixez le moteur pas à pas de l'axe Z au cadre de l'imprimante, généralement positionné en haut ou en bas, selon la conception de l'imprimante.
- Connexion de la Vis ou de la Tige Filetée de l'axe Z : Connectez solidement la vis ou la tige filetée de l'axe Z au moteur pas à pas et à l'ensemble de la tête d'impression. Ce mécanisme permet un mouvement vertical précis de l'ensemble de la tête d'impression le long de l'axe Z.
- Calibration de l'Endstop de l'axe Z : Ajustez le commutateur de fin de course de l'axe Z pour garantir un positionnement correct de la tête d'impression au début de chaque travail d'impression. Cela garantit une hauteur d'impression constante et précise.
- Vérification de l'Alignement Vertical : Vérifiez que les composants de l'axe Z sont alignés verticalement pour éviter tout blocage ou désalignement pendant le fonctionnement.
En suivant ces étapes détaillées, vous pouvez préparer efficacement l'axe Y et l'axe Z de votre imprimante 3D pour des performances optimales et une impression fiable.
Étape 4 Préparation du lit:
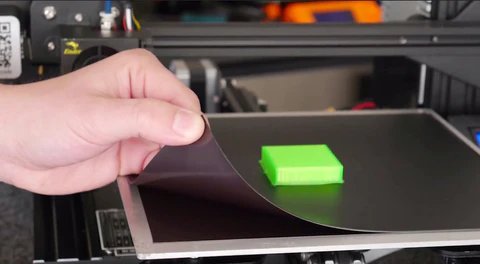
Nettoyer la Surface du Lit: Assurez-vous que la surface du lit d'impression est propre et exempte de tout débris, poussière ou résidu. Utilisez un chiffon sans peluche et de l'alcool à friction pour nettoyer soigneusement la surface du lit.
Appliquer un Adhésif: Selon le type de matériau du lit d'impression (par exemple, verre, PEI, BuildTak), appliquez un adhésif approprié pour favoriser l'adhérence entre l'objet imprimé et la surface du lit. Cela peut être sous forme de sprays adhésifs, de rubans adhésifs ou de revêtements spécialisés.
Niveler le Lit: Utilisez la fonction de nivellement du lit de l'imprimante ou ajustez manuellement les vis ou les écrous de nivellement du lit pour vous assurer que le lit est parfaitement nivelé. Cette étape est cruciale pour garantir que la première couche de l'impression adhère uniformément à la surface du lit.
Réglez la Température du Lit: Selon le type de filament utilisé, réglez la température du lit sur la température recommandée pour une adhérence optimale. Ces informations sont généralement disponibles dans les directives du fabricant de filament.
Calibrer le Décalage Z: Ajustez le décalage Z ou la hauteur de la buse pour garantir la distance correcte entre la buse et la surface du lit. Cette étape contribue à obtenir une adhérence correcte de la première couche et une qualité d'impression optimale.
Effectuer un Test d'Adhérence du Lit: Avant de commencer une impression complète, réalisez une petite impression de test pour vérifier l'adhérence du lit. Cela permet d'identifier les problèmes d'adhérence dès le départ et de faire les ajustements nécessaires.
Surveiller la Première Couche: Pendant les premières couches de l'impression, surveillez étroitement l'adhérence de l'impression à la surface du lit. Si des problèmes sont observés, tels que le gauchissement ou le soulèvement, mettez en pause l'impression et corrigez le problème avant de continuer.
Nettoyer et Entretenir Régulièrement: Après chaque impression, nettoyez la surface du lit pour éliminer tout filament ou adhésif résiduel. Un entretien régulier contribue à garantir une adhérence et une qualité d'impression cohérentes au fil du temps.
Étape 5 Faire les Connexions:
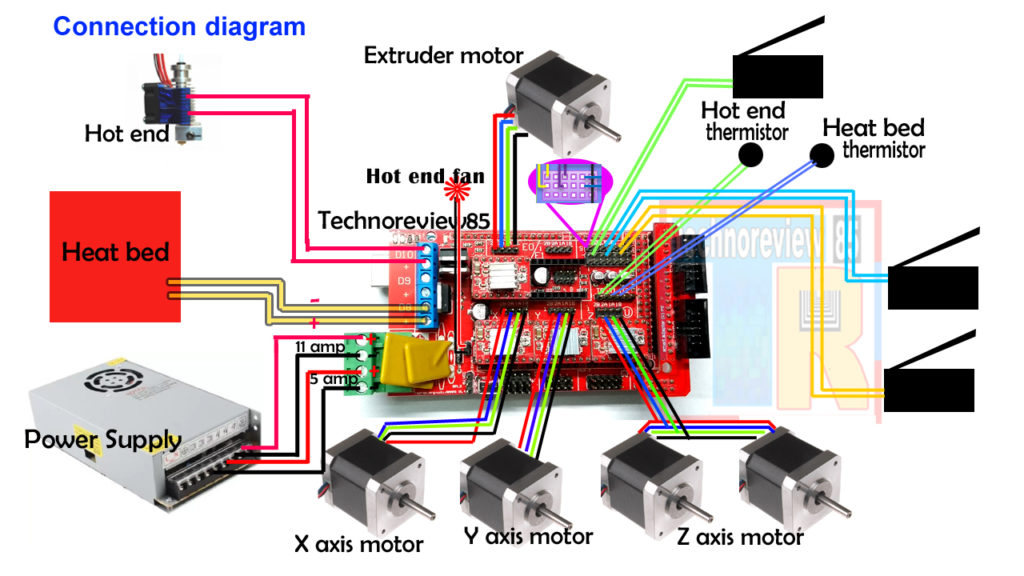
La prochaine étape consiste à réaliser les connexions électriques de tous les composants que vous avez déjà disposés. Tous les composants électriques tels que le ramps. Les pilotes et l'alimentation doivent être correctement liés pour fonctionner comme prévu. Pour éviter d'emmêler les fils, assurez-vous de traiter une connexion à la fois, en veillant à ce qu'ils ne se croisent pas sauf s'il n'y a pas d'autre solution.
Étape 6 Faire les Alignements
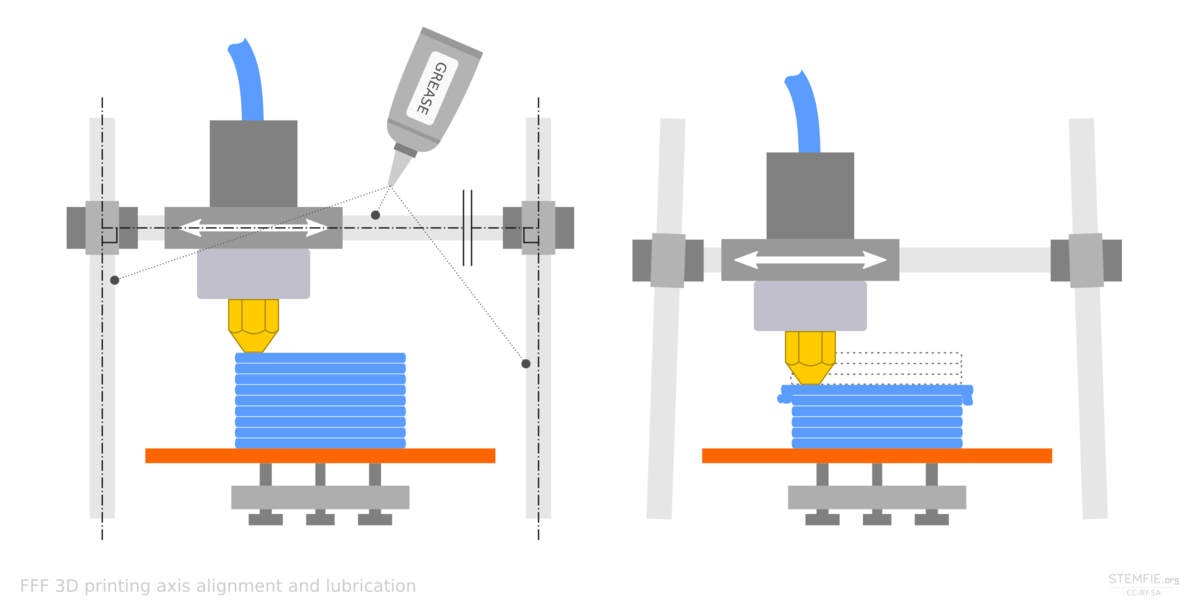
Le lit que vous avez créé précédemment doit s'aligner avec tout le reste, sinon vous risquez d'avoir beaucoup de difficultés à obtenir les bons modèles. Commencez par aligner votre lit, en le tournant dans le sens des aiguilles d'une montre et dans le sens inverse des aiguilles d'une montre jusqu'à ce que vous créiez un peu d'espace entre la pointe de la buse et le lit. La marge d'erreur doit être comprise entre 0,5 mm et 1 mm. Tout ce qui est plus grand que cela risque de provoquer des erreurs d'impression.
Étape 7 programmation:
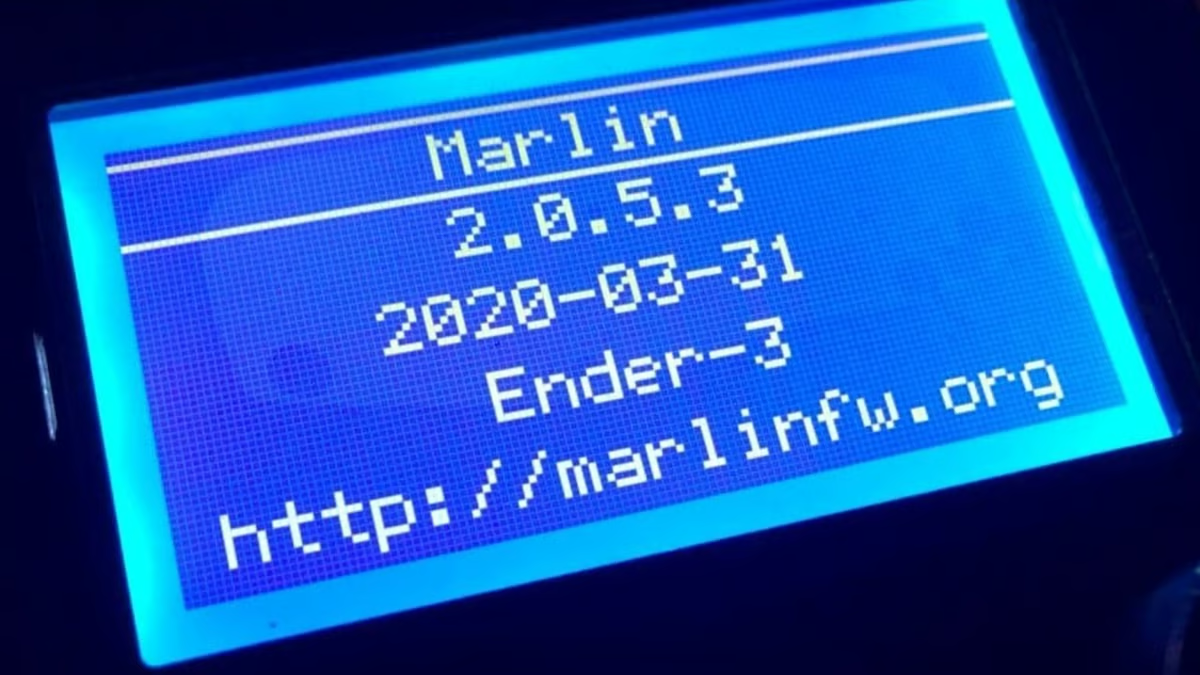
Choisissez le Firmware : Sélectionnez un firmware adapté à votre imprimante 3D. Les options populaires incluent Marlin https://github.com/MarlinFirmware/Marlin , Repetier et Smoothieware.
Configurez le Firmware : Personnalisez la configuration du firmware pour correspondre au matériel et aux spécifications de votre imprimante. Cela inclut des réglages tels que le nombre de pas des moteurs pas à pas par millimètre, la taille du lit, le type de thermistance et la configuration des fin de course.
Installez l'IDE Arduino : Téléchargez et installez l'environnement de développement intégré (IDE) Arduino sur votre ordinateur. Ce logiciel vous permet d'écrire, de compiler et de téléverser du code sur la carte Arduino.
Ouvrez le Sketch Firmware : Ouvrez le sketch firmware (code source) dans l'IDE Arduino. Ce fichier est généralement nommé 'Configuration.h' ou similaire, et il contient tous les réglages de configuration pour votre imprimante.
Modifiez la Configuration : Apportez les modifications nécessaires aux réglages de configuration dans le sketch firmware. Cela peut impliquer de décommenter ou de modifier des lignes de code spécifiques pour correspondre à la configuration de votre imprimante.
Compilez le Firmware : Vérifiez et compilez le sketch firmware modifié dans l'IDE Arduino. Ce processus vérifie les erreurs de syntaxe et convertit le code en un fichier binaire qui peut être téléversé sur la carte Arduino.
Téléversez le Firmware : Connectez votre carte Arduino à votre ordinateur via USB et sélectionnez la carte et le port appropriés dans l'IDE Arduino. Ensuite, téléversez le firmware compilé sur la carte Arduino.
Testez l'Imprimante : Une fois que le firmware est téléversé avec succès, mettez sous tension votre imprimante 3D et testez sa fonctionnalité. Vérifiez que tous les axes se déplacent correctement, que les fin de course sont activées correctement et que les éléments chauffants atteignent les températures souhaitées.
Étape 8 Faire fonctionner la machine:
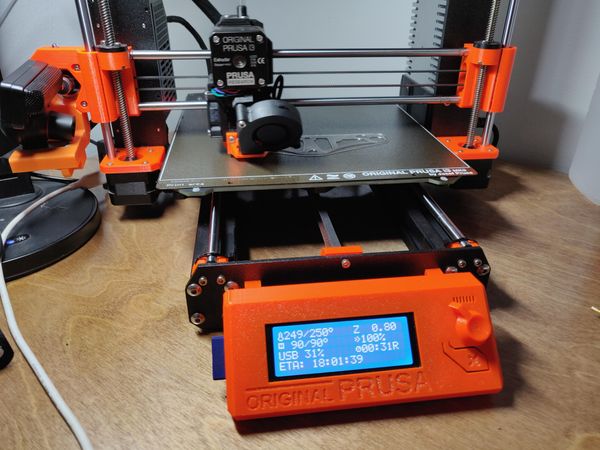
Faire fonctionner une imprimante 3D équipée d'Arduino implique plusieurs étapes :
- Assurez-vous que toutes les connexions électriques sont correctement branchées et sécurisées.
- Mettez sous tension l'alimentation de l'imprimante pour fournir le courant électrique nécessaire.
Ces étapes de base vous permettront de faire fonctionner une imprimante 3D équipée d'Arduino. Veillez à consulter le manuel d'utilisation de l'imprimante pour des instructions spécifiques ou des procédures supplémentaires.
- Vérifiez que l'écran d'affichage est correctement connecté à l'unité de contrôle (Arduino) et fonctionne correctement.
- Allumez l'unité de contrôle (Arduino) en la connectant à un ordinateur ou à une unité de contrôle compatible.
- Téléchargez le firmware spécifique à votre imprimante sur l'unité de contrôle (Arduino) à l'aide d'un logiciel approprié tel que Arduino IDE.
- Après avoir téléchargé le firmware, vous pouvez contrôler le processus d'impression via l'écran d'affichage et en utilisant les boutons disponibles.


26 Commentaire (s)
السلام عليكم \r\nاريد بناء طابعة ثلاثية الأبعاد وأحتاج قطع هل يمكنني الحصول على خصم
I am genuinely glad to glance at this website posts which contains lots of helpful data, thanks for providing these statistics.
I will right away take hold of your rss feed as I can’t in finding your email subscription link or newsletter service. Do you have any? Please allow me know in order that I may just subscribe. Thanks.
There is apparently a lot to know about this. I suppose you made various good points in features also.
I’ll immediately clutch your rss as I can’t in finding your e-mail subscription hyperlink or newsletter service. Do you’ve any? Kindly allow me realize in order that I could subscribe. Thanks.
Way cool! Some extremely valid points! I appreciate you penning this post plus the rest of the website is really good.
Very soon this website will be famous among all blogging visitors, due to it\'s good articles or reviews
Hello mates, its fantastic paragraph concerning tutoringand completely explained, keep it up all the time.
I am sure this post has touched all the internet users, its really really good paragraph on building up new website.
Ahaa, its nice dialogue regarding this article at this place at this webpage, I have read all that, so now me also commenting here.
Highly descriptive article, I liked that bit. Will there be a part 2?
It\'s very straightforward to find out any matter on web as compared to textbooks, as I found this article at this web site.
Very good information can be found on blog.
Thank you for sharing your thoughts. I truly appreciate your efforts and I am waiting for your further post thanks once again.
These are actually fantastic ideas in about blogging. You have touched some fastidious points here. Any way keep up wrinting.
https://www.eljnoub.com/\r\nhttps://www.eljnoub.com/\r\nhttps://www.eljnoub.com/\r\nhttps://www.rauhane.net\r\nhttps://www.s3udy.org/\r\nhttps://sexalarab.eu/\r\nhttps://hurenberlin.com/\r\nhttp://buybacklink.de/\r\nhttp://bestbacklinks.de\r\nhttp://backlinkservices.de\r\nhttps://www.q8yat.org/\r\nhttps://www.elso9.com/\r\nhttps://jalbalhabeb.org\r\nhttps://wikimedia.cc\r\nhttps://hurenberlin.com/\r\nhttps://www.elso9.com/\r\nhttps://www.eljnoub.com/\r\nhttps://www.q8yat.org/\r\nhttps://www.rauhane.net\r\nhttps://www.jeouzal.org\r\nhttps://www.alfalaki.net\r\nhttps://www.jaouzal.org\r\nhttps://casinoberlin.eu/\r\nhttps://www.sheikhrohani.de\r\nhttps://www.myemairat.de\r\nhttps://www.saudieonline.de\r\nhttps://www.nejetaa.de\r\nhttps://www.iesummit.de\r\nhttps://www.jalbalhabeb.de\r\nhttps://www.alukah.de\r\nhttps://www.mqaall.de\r\nhttps://www.elbalad.de\r\nhttps://www.muhtwa.de\r\nhttps://www.mawdoo3.de
I am sure this article has touched all the internet viewers, its really really good paragraph on building up new webpage.
I’ll right away clutch your rss feed as I can not in finding your email subscription link or newsletter service. Do you have any? Kindly permit me recognize in order that I may subscribe. Thanks.
Great post however , I was wanting to know if you could write a litte more on this subject? I\'d be very thankful if you could elaborate a little bit more. Bless you!
These are truly great ideas in regarding blogging. You have touched some nice factors here. Any way keep up wrinting.
I\'ll right away grasp your rss as I can not in finding your e-mail subscription hyperlink or newsletter service. Do you\'ve any? Please permit me know in order that I could subscribe. Thanks.
Some really fantastic work on behalf of the owner of this web site, absolutely outstanding subject material.
I love what you guys are usually up too. Such clever work and coverage! Keep up the excellent works guys I\'ve added you guys to my personal blogroll.
I am sure this article has touched all the internet users, its really really fastidious piece of writing on building up new webpage.
Hey there! I\'ve been following your web site for a long time now and finally got the courage to go ahead and give you a shout out from Atascocita Tx! Just wanted to mention keep up the great work!
My brother recommended I may like this web site. He was totally right. This publish truly made my day. You cann\'t imagine simply how much time I had spent for this information! Thanks!
Laissez un commentaire