Cet tutoriel montre comment envoyer des données d'un capteur de lumière vers le stockage Azure à l'aide d'une application Node.JS.
Truc utilisées dans ce projet:
- Composants matériels
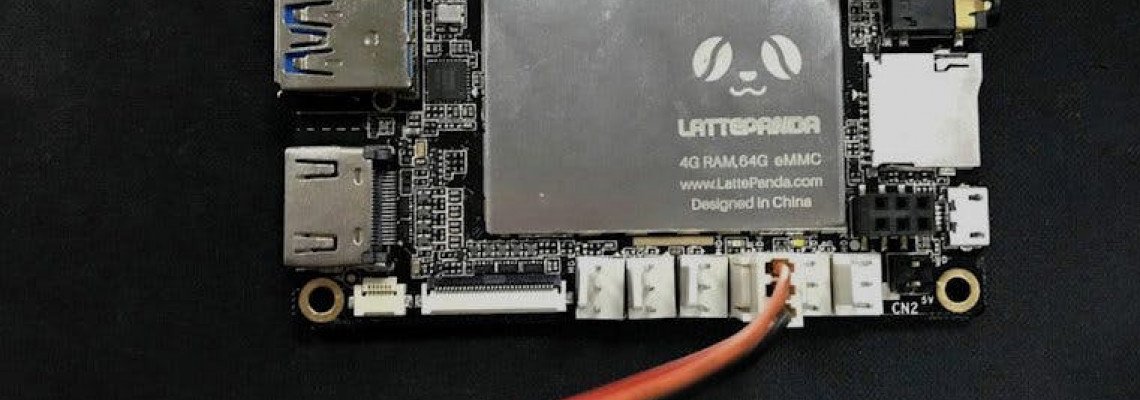
- LattePanda 2 Go / 32 Go (non activé) × 1
- Applications logicielles et services en ligne
- Téléchargeur de données Azure
Qu'est-ce que le stockage Azure:
Azure Storage est la solution de stockage cloud pour les applications modernes qui reposent sur la durabilité, la disponibilité et l'évolutivité pour répondre aux besoins de leurs clients. Azure Storage est massivement évolutif, vous pouvez donc stocker et traiter des centaines de téraoctets de données pour prendre en charge le grand
scénarios de données requis par les applications scientifiques, financières et médiatiques. Ou vous pouvez stocker les petites quantités de données requises pour un site Web de petite entreprise.
Ce processus en plusieurs étapes comprend:
- Préparez votre environnement de développement
- Configuration du stockage Azure
- Exécutez l'exemple et envoyez les données du capteur de lumière à Azure Storage.
- Préparez votre environnement de développement Configuration d'Azure Storage Exécutez l'exemple et envoyez des données de capteur de lumière à Azure Storage.
3 étapes pour exécuter l'application Azure IoT Hub sur votre LattePanda.
- Étape 1: Prérequis
- Étape 2: configurer le matériel
- Étape 3: créer et exécuter l'exemple
Étape 1: Prérequis
Vous devez disposer des éléments suivants avant de commencer le processus:
- Ordinateur avec client Git installé et accès au référentiel public GitHub azure-iot-sdks.
- Préparez votre environnement de développement.
Si vous ne possédez pas de compte de stockage, suivez Configurer votre stockage Azure pour en configurer un.
Configurer l'Arduino (il est pré-installé, sauf si vous avez modifié le programme Arduino)

Étape 2: configurer le matériel:
Insérez le capteur de lumière dans la broche analogique LattePanda A0, la configuration finale devrait ressembler à ceci:
Étape 3: créer et exécuter l'exemple:
Créez un fichier app.js et copiez-y le code suivant. assurez-vous d'entrer des valeurs valides pour accountName accountKey et arduinoPort. Vous pouvez également modifier tableName. Placez le fichier dans le dossier de votre choix sur votre LattePanda
var azure = require («azure-storage»);
var five = require ('johnny-five');
var accountName = ''; // Entrez le nom de votre compte de stockage Azure
var accountKey = ''; // Entrez votre clé de compte de stockage Azure
var tableName = 'MyLightSensorData'; // Nom de votre table pour stocker les données du capteur de lumière
var arduinoPort = 'COM3'; // Entrez votre port Arduino
var tableService = azure.createTableService (accountName, accountKey);
if (CreateTable ()) {
InitializeBoard ();
}
// Créer une table dans le stockage Azure
function CreateTable () {
tableService.createTableIfNotExists (tableName, fonction (erreur, résultat, réponse) {
si (erreur) {
console.log (erreur);
retour faux;
}
});
return true;
}
// Initialiser la carte Arduino avec Johnny-Five
fonction InitializeBoard () {
var board = new five.Board ({port: arduinoPort});
board.on ('ready', function () {
lightSensor = new five.Sensor ({
broche: "A0",
fréquence: 10000 // 10 secondes
});
lightSensor.on ('change', function () {
InsertValue (this.value);
});
});
}
fonction InsertValue (valeur) {
console.log ('Valeur à insérer:' + valeur);
// Créer une entité à stocker dans la table avec la valeur
// du capteur de lumière et de la date.
var entGen = azure.TableUtilities.entityGenerator;
entité var = {
PartitionKey: entGen.String ('Light'),
RowKey: entGen.String (String (Date.now ())),
intValue: entGen.Int32 (valeur),
dateValue: entGen.DateTime (new Date (). toISOString ()),
};
// Insère l'entité dans la table de stockage Azure
tableService.insertEntity (tableName, entité, fonction (erreur, résultat, réponse) {
si (erreur) {
console.log (erreur);
}
});
}
Ouvrez un nouveau shell ou une invite de commande Node.js et accédez au dossier dans lequel vous avez placé les exemples de fichiers. installez les bibliothèques azure et johnny-five à l'aide des commandes suivantes:
npm installer azur
npm installer johnny-five
Exécutez l'exemple d'application à l'aide des commandes suivantes. Toutes les 10 secondes, le code enverra la valeur du capteur de lumière au tableau spécifié.
node app.js
Vous pouvez ensuite afficher les données envoyées au stockage Azure avec Power BI. Dans Power BI, cliquez sur le bouton Obtenir les données, sélectionnez «Microsoft Azure Table Storage» comme source, puis suivez les étapes pour vous connecter. Une fois connecté, vous pouvez sélectionner votre table et afficher les données du capteur de lumière qui ont été envoyées depuis votre LattePanda.

Code
sampleC / C ++:
var azure = require («azure-storage»);
var five = require ('johnny-five');
var accountName = ''; // Entrez le nom de votre compte de stockage Azure
var accountKey = ''; // Entrez votre clé de compte de stockage Azure
var tableName = 'MyLightSensorData'; // Nom de votre table pour stocker les données du capteur de lumière
var arduinoPort = 'COM3'; // Entrez votre port Arduino
var tableService = azure.createTableService (accountName, accountKey);
if (CreateTable ()) {
InitializeBoard ();
}
// Créer une table dans le stockage Azure
function CreateTable () {
tableService.createTableIfNotExists (tableName, fonction (erreur, résultat, réponse) {
si (erreur) {
console.log (erreur);
retour faux;
}
});
return true;
}
// Initialiser la carte Arduino avec Johnny-Five
fonction InitializeBoard () {
var board = new five.Board ({port: arduinoPort});
board.on ('ready', function () {
lightSensor = new five.Sensor ({
broche: "A0",
fréquence: 10000 // 10 secondes
});
lightSensor.on ('change', function () {
InsertValue (this.value);
});
});
}
fonction InsertValue (valeur) {
console.log ('Valeur à insérer:' + valeur);
// Créer une entité à stocker dans la table avec la valeur
// du capteur de lumière et de la date.
var entGen = azure.TableUtilities.entityGenerator;
entité var = {
PartitionKey: entGen.String ('Light'),
RowKey: entGen.String (String (Date.now ())),
intValue: entGen.Int32 (valeur),
dateValue: entGen.DateTime (new Date (). toISOString ()),
};
// Insère l'entité dans la table de stockage Azure
tableService.insertEntity (tableName, entité, fonction (erreur, résultat, réponse) {
si (erreur) {
console.log (erreur);
}
});
}




Laissez un commentaire